Get Started with Frames
First, let's see what's inside Frames kit. ⤵

Next, we install the library to let you quickly access its contents:
Set Up As a Library
◦ Open Frames file, and select File → Add as library…
Done, now Frames is your library, and you can access it symbols and styles in any other documents via the Add menu , styles, and components panel.
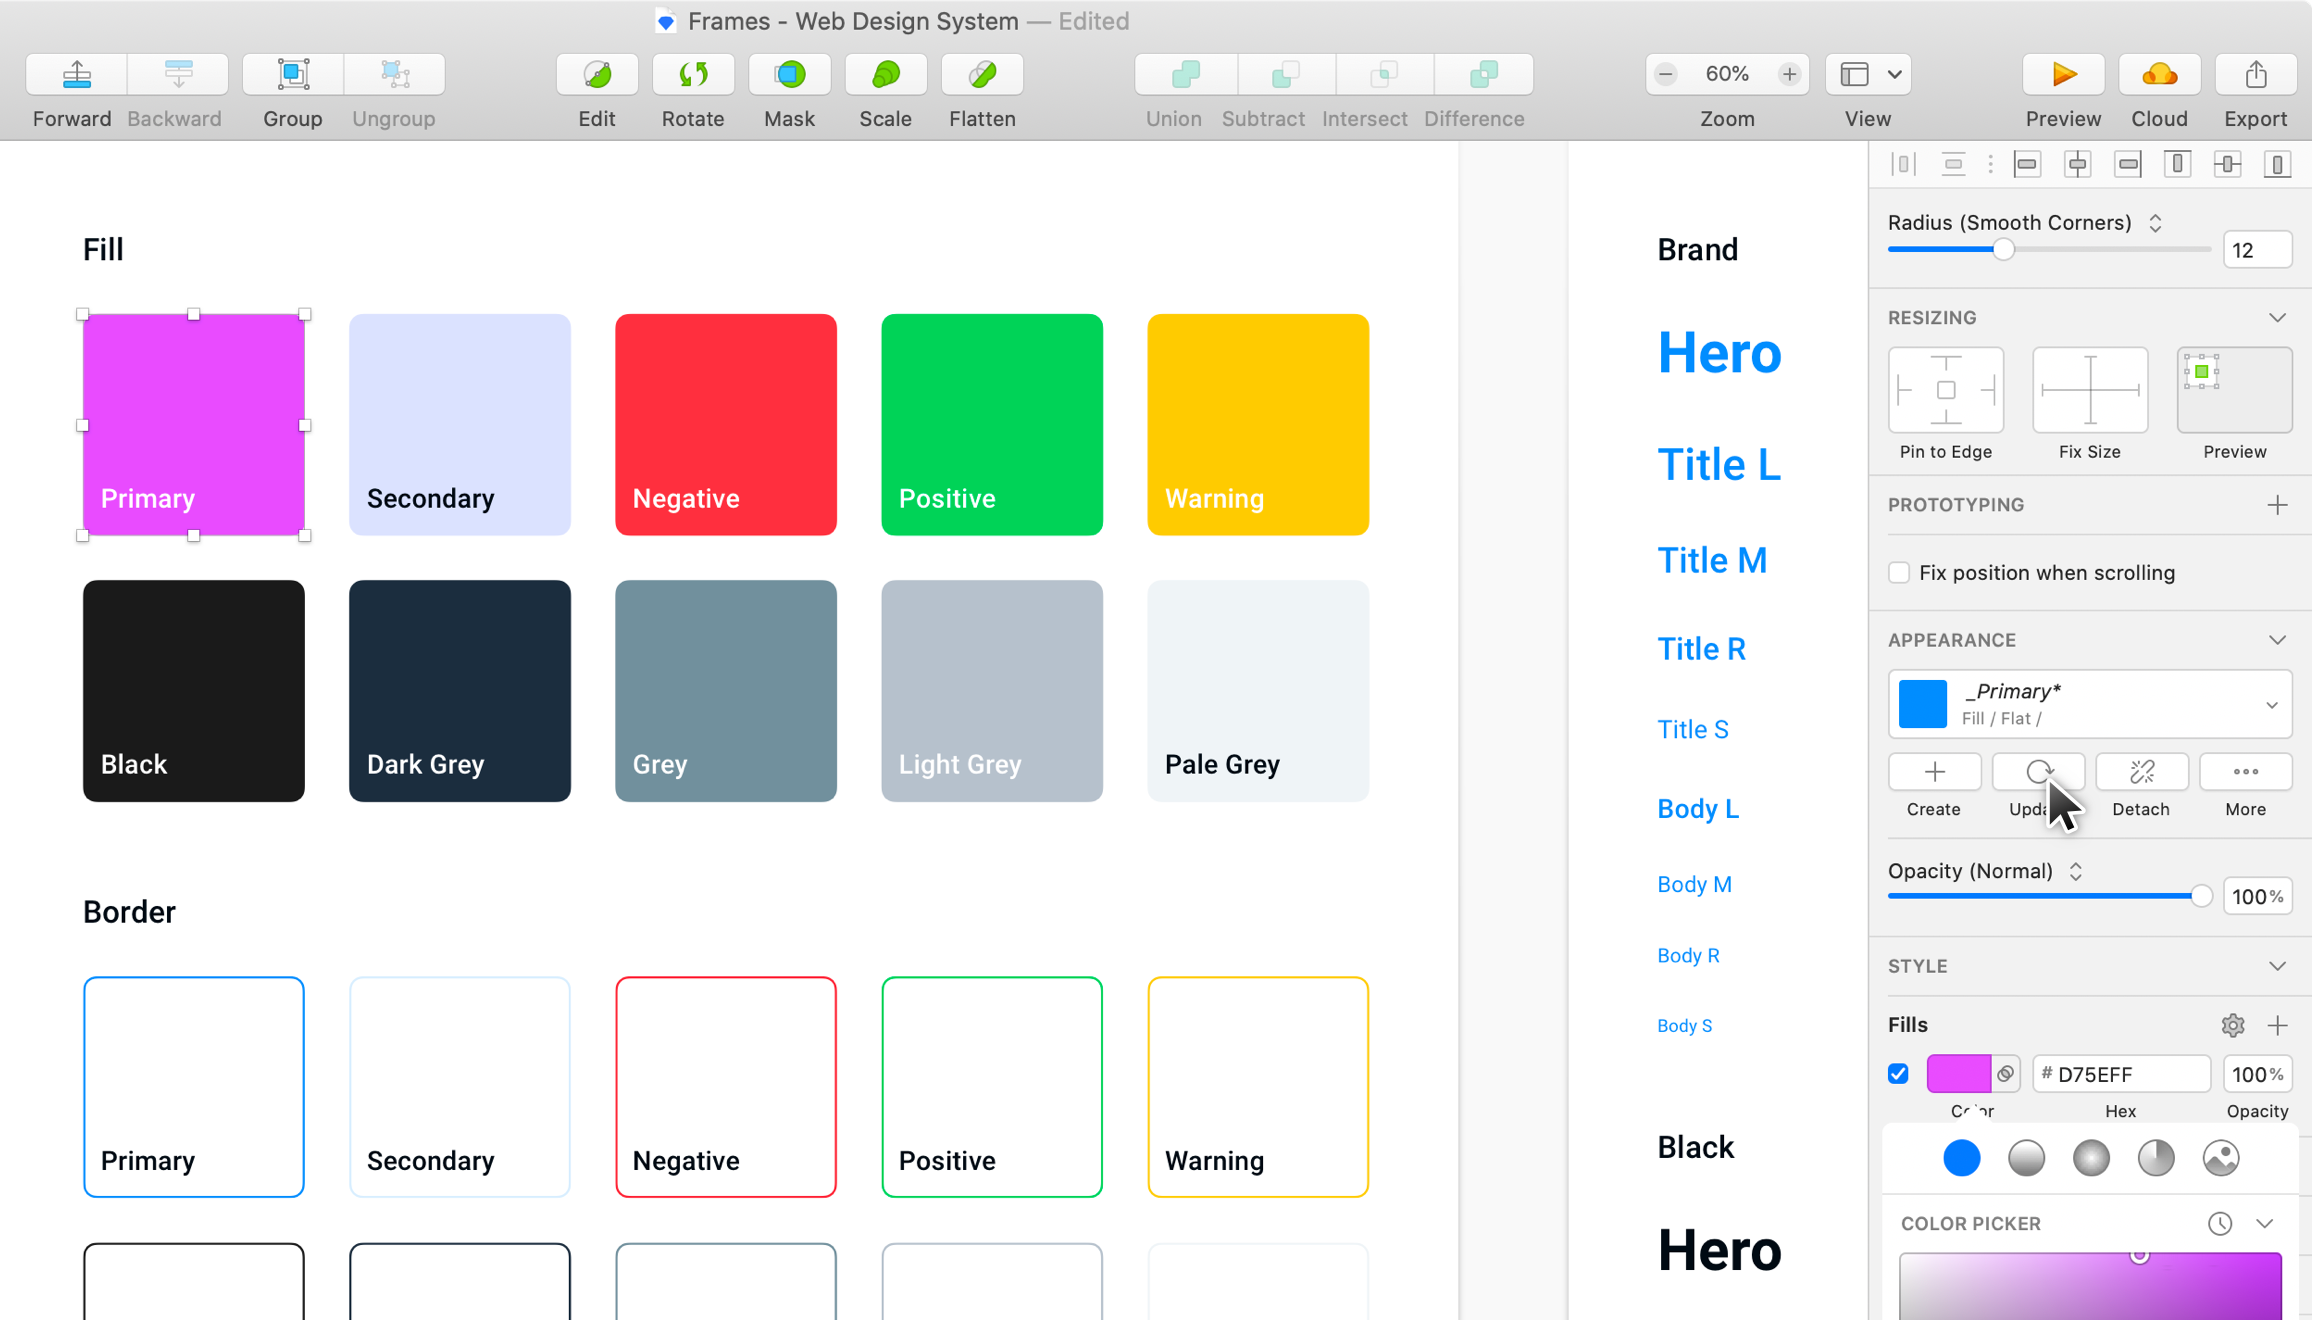
Customize Layer Styles
◦ Navigate to the Get Started page.
◦ Choose and adjust any predefined styles.
◦ To see the changes click on the update button.

Customize Text Styles
◦ Navigate to the Get Started page.
◦ Holding ⌘ key, select the desired group of text layers.
◦ Choose a new font or edit text properties.
◦ To see the changes click on the update button.
ⓘ Frames kit provides Roboto and Rubik fonts by default, you can get them from fonts.google.com.
Design with UI Kit
After colors and text are ready, you can jump into designing a website or prototype.
Frames kit provides a collection of predesigned layouts you can pick from and start your design upon it. To use it correctly:
◦ Navigate to the UI Kit page.
◦ Choose a layout or a particular elements you want to use.
◦ Edit and customize design elements at your liking.
◦ Combine layouts to create your designs.
Additional contents
In addition to the UI kit, you can start your work with premade templates or enrich it with charts and graphics.
Templates
You can choose from a landing page, product page, store, or portfolio templates. All templates are provided in 3 resolutions to fit common screen sizes in 1440px, 1024px, and 360px width artboards.
Charts
The file includes a set of stretchable and customizable charts; you can find them by navigating to the Charts page.
Plugins
You can use Frames with popular extensions to perform advanced techniques and easily manage your design system.
Learn more from the blog:
Sketch Tools for Managing a Design System ↗
Still have questions?
Let me know if you have any additional questions, feel free to Tweet me or shoot an email to [email protected].